Introduction

Would you like to familiarize yourself with the Pronotif interface and its features? This tutorial (Getting Started guide) has been designed for you. It presents the essential concepts that will help you get the most out of your Pronotif account.

Although the Pronotif service is designed to facilitate the user experience, we strongly advise you to take 5 minutes to read this tutorial.

Creating a New Account

In order to create a Pronotif account, go to the Pronotif registration page and fill in the fields. To get the best experience for your specific needs, please indicate the industry in which you operate. Once your account is created, you will be able to add users within your organization in your settings.

Certified Email (Notification)

Pronotif’s certified email feature (legally called “notification”) is ideal for businesses and professionals who need to notify emails and documents, while obtaining a compliant and valid proof of transmission. In order to implement certified email, click on the “Certified Email” button in your certified email dashboard on the “New Activity” button.

Here Are the 4 Steps to Follow:

  1. Enter the names of your recipients by clicking on the “New Recipient” button, or simply select them from a predetermined list. Previously entered names will appear via autocomplete. When you are done, click on “Next Step”.
  2. Enter the subject of the message and the internal file number for your certified email. Compose your message and add attachments to all or specific recipients. When you are finished, click on “Next Step”.
  3. Select the options you want and, if necessary, add collaborators to your certified email. Collaborators are users within your organization that you want to give access to the certified email that will be forwarded. By adding them, the collaborators will be able to track the certified email and view all interactions associated with it, as if they were the ones who sent it. When you are done, click on “Next Step”.
  4. Review the email and make sure all the information is correct. This is only a preview, so your recipients’ names do not appear yet at this stage. When you are done, click on “Confirm & Send”.

Tracking and Proof

The “Tracking” tab located on the left sidebar of your screen allows you to track all your transmissions in real time.

  1. When you click on a type of activity (certified email, file transfer, document collection, etc.), you get access to the global list of all your outgoing and incoming communications.
  2. If you click on a specific transmission, you get access to its detailed page. The “Overview” tab allows you to see all the recipients contained in the transmission and their delivery status (transmitted, opened, downloaded, or replied to).
  3. If a recipient has replied to you via the “Reply to sender” button in the received email, their message will be accessible under the “Communications” tab (next to “Message”) in a timeline format.
  4. The orange “Proof Report” button allows you to access a dynamic PDF document that contains the proof and transmission details for each recipient.

What Is a Pronotif Certified Notification/Email?

Pronotif is a service (online platform) for electronic notification. Its system ensures secure and reliable transmission of legal documents and notices. Pronotif allows the sender to serve documents and notices, while confirming through technology that the content has been received, viewed, or downloaded.

In the following decisions, the Tribunal administratif du logement has recognized the validity of Pronotif:


  1. Shah v. Edwards-Daugherty 2017 QCRDL 4287;
  2. DCV Properties v. Biaye 2017 QCRDL 15611;
  3. DCV Properties v El Hage 2017 QCRDL 15608;
  4. DCV Estates v. Kammoonah 2017 QCRDL 15609;
  5. DCV Estates v. Hamane 2017 QCRDL 15612;
  6. DCV Estates v. Horn 2017 QCRDL 15614;
  7. Immobilière Montérégienne IMR inc. v. Snoussi 2016 QCRDL 40347;
  8. Gestion double RR v. Quenneville 2016 QCRDL 42579;
  9. Immobilière montérégienne IMR inc. v. Colbert 2016 QCRDL 40853.


All transmissions via Pronotif instantly generate a Proof Report that contains a verification audit of the transmission. The report proves the transmission by clearly establishing, through the time stamp and email server confirmation, the exact second the recipients received, opened, and downloaded the email.

It is not necessary for the recipient to open the email in order for delivery to be confirmed. In other words, as soon as the email is successfully received by the recipient’s mail server (i.e. it is in the inbox), Pronotif captures the confirmation from the mail server (the SMTP response) and enters it into the Confirmation Report.

The Report complies with the new Code of Civil Procedure of Quebec, as well as with the rules of procedure of other Canadian provinces and some American states.

In summary, the Report indicates:

  1. The name, nature, and page number of the documents served.
  2. The integrity of the documents: this is a computer code that confirms to the recipient that the document was transmitted without any alteration or intrusion during the transfer.
  3. The name and contact information of the sender and the recipient.
  4. The date and time (to the nearest second) that the email was received.
  5. The result of the transmission: Successfully transmitted, Opened, Downloaded, Re-bound, Blocked, etc.
  6. The SMTP response: The response from the recipient’s mail server confirming the status of the transmission.
  7. The IP address of the sender’s computer (or mobile device) as well as the one of the recipient. This is a unique identifier that indicates the location of the sender and the recipient.

When to Use Pronotif Certified Emails?

You can use Pronotif Certified Email services to send all official notices and documents to your tenants:

  • Rent Increase Notices;
  • Changes to the lease;
  • Default of payment;
  • RL-31 Slip;
  • Complaints (noise, etc);
  • Notice of non-compliance with lease conditions;
  • Notice of default;
  • Notice of refusal of lease transfer;
  • Notice of major work or repairs;
  • Repossession of the dwelling;
  • Change of landlord or manager.

What kind of security does Pronotif provide?

All Pronotif transmissions and communications go through a secure HTTPS tunnel, AES 256 encryption and an SSL certificate. All data is encrypted in transit and at rest.

What Is a Consent Request?

A consent request is the simple act of agreeing to an action. In the context of Pronotif, the consent request will allow you to receive a person’s authorization to communicate with them through our Pronotif platform if they agree.

If the person refuses the consent request, you will have to contact them by another means.

How do I get my tenants' consent to receive emails?

When you add your tenants to your Pronotif account, you can indicate whether you have received their consent to send them emails. For those whose consent has not yet been obtained, you can request it by using the “Consent Requests” feature of Pronotif.

Here is how to do It:

  1. Go to the “Consent Requests” tab located in the left menu.
  2. Click on the “New” button.
  3. Select the tenants for whom you wish to obtain their consent.
  4. In the second step of creating your activity, the “subject” and “message” fields will already be filled in for you.
  5. Complete all the following steps to create the activity, then click on “Confirm & Submit”.

You will be notified by email as soon as a recipient accepts your request, and their consent status will be updated in your Pronotif account.

Once a tenant has given you his or her consent, you will be able to send them notifications using Pronotif’s certified email service.

Sending a notification

Here are the steps to follow to send a certified email:

1- From your Dashboard, click on the “Email Notification” button.

2-Choose your recipient(s) from your list or create a new recipient.

3-Write your message:

a-Add a reference text to properly organize your mailings.

b-Write your message or select one of the templates.

c-Add the attachment(s) you wish to send.


4-Options: Select additional options such as scheduling the sending date, email alerts, reminders to recipients, etc.

Optional: under the Collaborators section, enter the name(s) of the people you wish to give access to the full tracking of this certified email.


5-Verify your message and click on “Confirm and send”.

Organize your emails with the "Reference" field.

When sending a notification, use the “Reference” field to organize your mailings according to the type of notification.

Ex: Rent increase notice 2021

This will allow you to sort your notifications and have a better overview of your notifications.

Follow-up of a notification

Thanks to the Pronotif dashboard, you can stay informed of the activities related to your notifications.

On the right side, you will find a chronological list of all recent activities related to your mailings.

By clicking on an activity in the News Feed, you will be redirected to a page detailing all the information related to the mailing.

To obtain a complete list of all your submissions, click on the “Electronic Notifications” or “Consent Requests” tab where you will find all your submissions according to the selected category.

What kind of proof does pronotif provide?

Upon notification of an electronic document via certified email, Pronotif automatically generates a proof report containing a detailed audit trail of the transmission. The report proves the transmission by clearly establishing by time stamp and email server confirmation, the exact moment your recipient received your email, opened it, and downloaded its content. If you are a legal user, the report also contains all the information required by the rules of civil procedure in North America, to the extent that notification is permitted.

The proof report

This report is generated instantly by our servers for each recipient and can be found as a link in all emails, as well as on the Dashboard.

The Proof Report is used as proof for each notification and includes information about each transmission, opening, and download of an attachment (name, size, SHA256 integrity). The report also details the sender and recipient information, as well as the response from the email servers (SMTP). The SMTP response is actually the response that the recipient’s email server sends back, with a code that indicates whether the message was delivered, blocked, skipped due to the recipient not existing, etc.

This report, like a fax report, indicates that the email has been transmitted to the recipient’s server. However, it does not say anything about reading the email, just like a fax would print the document without being picked up by anyone. Knowing this, we have added in our services the possibility to validate if the notification has been opened and if the attached files have been downloaded by the recipients.

How can I confirm if my email has been read and if the file has been downloaded?

When you make a notification, the Pronotif technology allows you to track the progress of the notification and the recipient’s server. You can therefore determine if the email was forwarded, if the recipient opened your email and if he/she downloaded the attachments. All this is available in the Overview section.

Where are my files and who can download them?

When you add files as attachments to a Pronotif notification, they are not actually sent in an email. Your attachments are sent through a secure tunnel (HTTPS) to our servers. Once on Pronotif, the files are saved in a “secure container”, and only download links are included in an email to your recipients. These links will then lead to a web page that will allow recipients to download the document and verify its integrity (SHA256 key) if they wish.

Notification by Technological Means Under the New Code of Civil Procedure of Quebec

On January 1, 2016, the new Code of Civil Procedure of Quebec (“CCP”) came into force. While it includes a host of changes such as the development of a protocol of proceedings (formerly the timetable or agreement on the conduct of the proceedings), the simplification of expert opinions and the emphasis on mediation, one of the most exciting new features is notification by technological means (art. 133 and 134 CCP).

Indeed, from now on the notification (i.e.: service without a bailiff) of a document can be done by “transmitting the document to the address that the addressee indicates as the place where he agrees to receive it or to the one that is publicly known …”. Within the legal community, a colleague’s email address fits this criterion perfectly.

However, where the complexity arises is with respect to proof of service. The CCP indicates that this proof is made by means of a dispatch note (or failing that, an affidavit by the sender). This docket must indicate “the nature of the document transmitted, the court file number, the names of the sender and recipient and their contact information, as well as the place, date, time and minutes of the transmission (…)” The CPC further specifies that unless the transmission is made through a bailiff, the docket must also contain “the information necessary to enable the recipient to verify the integrity of the transmission.”

Obviously, a simple email does not meet these requirements; hence Pronotif’s innovation. We have developed the world’s first solution that allows landlords to directly notify their tenants while respecting the criteria of the new CPC (and the procedural rules of more than 20 jurisdictions around the world). Specifically, as soon as a user presses “Confirm & Send” via the web interface, Pronotif automatically generates a confirmation report that not only contains all the elements listed above, but also establishes the integrity of the transmission and the attached documents through an encryption process. Pronotif confirms the success and details of the transmission and provides you with an audit report containing the document specifics and time stamp.

Note: Pronotif is an application developed with the Quebec legal framework in mind. Users can also use it for transmissions outside Quebec, but caution is recommended until validation has been completed.

How Do I Demonstrate the Notification of an Application to the Tribunal Administratif du Logement?

The Pronotif service allows you to notify the other party of an application filed with the Tribunal administratif du logement. In fact, the Regulation respecting the procedure before the Tribunal allows the applicant (you in this case) to use a “notification” method to bring an application to the attention of the other party.


As this is a new service, not all decision-makers have had the opportunity to deal with cases where an applicant has chosen Pronotif to notify their application. Decision-makers vary in their familiarity with the technology, so some may be more skeptical than others. We would like to remind you that as it stands, the law allows for the use of this method of notification and there is no legal impediment to its use before the Tribunal administratif du logement.

Therefore, we strongly suggest that you use the following method in preparation for a hearing at the Tribunal. You should be aware that the administrator will ask you at the outset to show proof of your notice.

Therefore, you should print and attach:

  1. The tenant’s consent sheet (if handwritten) or, if applicable, the consent report obtained by Pronotif;
  2. The Pronotif evidence report associated with your notification (“Notification”);
  3. The confirmation sheet of the email transmission steps appearing in your Overview tab;
  4. The exhibit, notice, and document(s) attached to the secure email. Please note that this exhibit is named to the evidence report mentioned above.

Jurisprudence

Pronotif is fully justified considering the Quebec legal framework. The Code of Civil Procedure, adopted in 2014, describes notification as “any appropriate method that allows the person who gives notice to constitute proof of the delivery, sending, transmission or publication of the document, (…) in particular by a bailiff, by mail, by delivery of the document, by technological means, or by public notice”.

The Act to establish a legal framework for information technology (the “Act”) is the reference framework in this regard. This Act provides, among other things, that a document is a set of information carried by a medium, which can be rendered by any means of writing. In other words, the medium may be physical or technological and the manner in which it contains the information does not affect the definition of a record.

The Act further provides that the legal value of a record is not increased or decreased solely because a specific medium (physical or technological) has been chosen and that a record has the same value regardless of the medium used, as long as its integrity can be assured. Integrity means that it can be demonstrated that the information contained is not altered and is maintained in its entirety, with its medium providing the desired stability and permanence.

With respect to transmission, the Act is clear on the validity of a communication made by a technological mode.  First, it states that a document may be “transmitted, sent or forwarded by any mode of transmission appropriate to the medium” unless the law requires the exclusive use of a specific mode. There is nothing in the Residential Tenancies Act that requires a specific method.

But what about receipt? The Act states that a document is presumed to be received or delivered when it becomes available at the address that the recipient indicates is the location at which the recipient agrees to receive a document from him or her, so long as the address is active.

Pronotif is of interest because the process it uses ensures the reliability of the information transmitted to the recipient and is a legally valid method of transmitting documents.

– In the following decisions, the Régie has recognized the validity of Pronotif.

  1. Shah v. Edwards-Daugherty 2017 QCRDL 4287;
  2. DCV Properties v. Biaye 2017 QCRDL 15611;
  3. DCV Properties v El Hage 2017 QCRDL 15608;
  4. DCV Estates v. Kammoonah 2017 QCRDL 15609;
  5. DCV Estates v. Hamane 2017 QCRDL 15612;
  6. DCV Estates v. Horn 2017 QCRDL 15614;
  7. Immobilière Montérégienne IMR inc. v. Snoussi 2016 QCRDL 40347;
  8. Gestion double RR v. Quenneville 2016 QCRDL 42579;
  9. Immobilière montérégienne IMR inc. v. Colbert 2016 QCRDL 40853.

Note: Pronotif is an application developed with the Quebec legal framework in mind. Users can also use it for shipments outside of Quebec, but caution is recommended as long as there has not yet been validation.

Where are your servers located?

We use Microsoft Azure Canadian servers to ensure that your data is located on Canadian soil, including all backups.

What is an SMTP response?

SMTP stands for Simple Mail Transfer Protocol and is commonly used by most email servers. Your message will be transferred from one point to another, from your mailbox to the ones of your recipients. During these various “hops” (think of them as jumps), the servers will send back responses to indicate success or failure, as well as the reasons if the transmission fails. Here are some examples of SMTP responses, from the SendGrid site (https://sendgrid.com/blog/smtp-server-response-codes-explained):

250 – This SMTP server response simply means that everything went well, and your message was delivered to the recipient’s server (it does not mean that your message was opened…).

421 – Your message has been temporarily delayed by the recipient server. This is usually due to too many connections in a short period of time or too many messages.

450 – Your message was not delivered because the other user’s mailbox was not available. This can happen if the mailbox is locked or not routable.

451 – This response is sent when the message simply failed. Often, this is not your fault, but the fault of a remote server.

452 – This type of response is sent when there is not enough system storage to send the message. Your message is postponed until storage becomes available and it can be delivered.

550 – The message failed because the recipient’s mailbox is unavailable or because the receiving server rejected your message.

551 – The mailbox for which your message was intended does not exist on the recipient’s server.

552 – The mailbox to which your message was sent does not have enough storage space to accept your message.

553 – Your message was not delivered because the name of the sent mailbox does not exist.

Can I use Pronotif to send notices to my tenants regardless of the state or province they are in?

In some jurisdictions, the law does not specifically mention the format in which a notice to a tenant is supposed to be delivered. Obviously, it must be “in writing”, but sometimes it is not specified whether an electronic format is acceptable. Also, remember that Pronotif is not just an email, it is an email with a full audit trail and proof of delivery. Therefore, for markets where email notifications are not yet confirmed as valid, we have created a feature called “Request Consent”. It can be used to gather consent from tenants, prior to sending them official notifications via Pronotif. This consent confirmation is then added to the proof report that Pronotif instantly generates for each notice sent.

What are the existing notice templates and how can I use them?

Pronotif has created a full range of predefined templates for you to use for the most popular notifications (e.g., Lease Renewal, Late Payment Notice, etc.).

Your choice of notice template should be made at the second step of creating a certified email, by selecting the desired template from the list. The subject and message fields of your email will then be automatically filled in for you – in English, French, or both.


Can I create my own notification templates? If so, how do I go about it?

Yes, you can create up to 6 custom templates for each type of activity.

Here is how to do it:

  1. Go to the “Settings” section of your account by clicking on the user icon located in the upper right corner of the page, next to your name;
  2. Click on the “Templates” tab located in the left-hand menu;
  3. To create your custom template, click on the “New Template” button.


Note: once created, your template can be used for the second step (Compose) of creating a new activity. Each custom template created will only be displayed according to its type of activity. For example, if you create a Certified Email ™ template, it will only be displayed when creating a Certified Email ™. Also, be aware that you can create a French and an English version for each of your templates.

What Are Recipient Reminders and How Do I Set Them?

In the third step of creating your activity, you have the option to set a reminder to recipients. If you select this option, Pronotif will resend your email to recipients who have not opened it when it was first sent or who have not downloaded its attachments after 5 or 7 days.

In other words, if you set a reminder for your tenants who have not opened your email five days after it was initially sent, it will automatically be resent to them.

What Does the "Allow Recipient to Reply to Email" Option Mean?

In the third step of creating an activity, you have the option to enable recipient responses. If so, your recipients will be able to reply directly to your email via the Pronotif secure reply portal. You will be notified by email when a response is received.

Responses to your emails will always appear under the “Communications” tab on their respective detail pages, as well as in their evidence reports.

“Communications” tab on their respective details page, as well as in their evidence report.

Note: Your recipients do NOT need to have a Pronotif account to reply to your emails via our secure portal.

What are personalization tags and how to use it?

Personalization tags allow you to send mass emails in a personalized way, with each recipient’s specific information.

Whether you use a notification template or create a new message from scratch, you can add tags that will be automatically filled in when sending, based on the recipient’s personal information (e.g., recipient’s name, recipient’s email, etc.)

The fourth step of creating an activity gives you a preview of how your email will look like overall. To view it by a specific recipient, click on the link above the email that shows the number of recipients (see screenshot below), then select the desired recipient.

How do I send a notice to an entire property?

Once you have imported a property and its tenants, they are available at the first activity creation. You can select them individually or choose a particular property that includes all tenants.

Can I send an email to all my tenants at the same time, even if they don't speak the same language?

When you create a new tenant, Pronotif always asks you to select the tenant’s language (French, English, or both). Pronotif thus allows you to send different versions of the same email according to the language preferences of each recipient.

When creating an email, after adding your recipients, Pronotif will examine their respective language preferences and automatically generate a “subject” and a “message” in each of the languages represented by your recipients.

Note: A French-speaking recipient will only receive the email in French, while an English-speaking recipient will only receive the email in English.

Where can I see the files I have sent?

You can view all your sent emails and files from your outbox. First, click on the email whose attachment(s) you wish to view, then click on the File(s) link located at the top of the table (see screenshot below). Finally, click on the desired file(s) to download them.

How Do I Create my Account?

To create a new Pronotif user account, click on “Sign up” and fill in the fields.

Are you a member of CORPIQ? Enter the numbers on the back of your membership card to get your discounts.

You will receive a confirmation email to finalize the creation of your account. Click on the link to complete your account.

Forgot Your Password?

If you have forgotten your password, use the “Forgot your password?” link on the login page.

Then enter the email address you used when you created your account. A message allowing you to reset your password will be sent to this address.

How do the Pronotif credits work?

1 credit is equivalent to 1 recipient. Thus, a certified email sent to 3 recipients will cost 3 credits. These credits will be automatically deducted from your credit bank.

Note: You can see your credit bank at any time, simply by looking at the top right corner of your page, next to your name.

How can I buy Pronotif credits?

You can buy Pronotif packages of 5, 50, 200 and 500 credits directly from the billing page of your account.

Here is how to do it:

  1. Open the “Settings” menu of your account by clicking on the user icon located in the upper right corner of the page, next to your name;
  2. Click on “Billing”;
  3. Make sure your credit information is accurate and up to date;
  4. Choose the package of your choice;
  5. Click on the “Buy” button.

How to Obtain the CORPIQ Member Discount

To obtain the CORPIQ member discount, it is essential to enter the 22 characters (M + 21 digits) on the back of your CORPIQ card.

Be careful not to enter your membership number when creating your account.

After creating your account

Select the “Settings” section in the menu:


Then go to the “My account” section and click on “CORPIQ”:


Insert the 22 characters (M + 21 digits) on the back of your card under CORPIQ. If your code is valid, an indication will be present under your number.

ATTENTION : Make sure you click on ” Save “.

Add Your Properties and Tenants

Use the property list to organize your recipient lists.

You can use our property import process directly via Microsoft Excel or use our form to add a new property and tenants one-by-one.

If you use our form:

1-Add a property: Enter your building information and click “Save”

2-Add the recipients in the tenants section by clicking on the “New Tenant” button and click on “Save”.

How Do I Save my Own Electronic Notification Template?

To create and save new templates for your account and/or your organization’s account, you must first have an administrator role on the account. If you don’t, contact the administrator(s) of your organization’s account and request a role change.

If you are an administrator, nothing could be easier, click on your first and last name at the top right of the screen.

Then click on “Settings” and “Templates”.

Once you are on the “Templates” page, all you have to do is click on “Create a new template”.

You can create up to 6 templates per type of activity.

How Do I Start Communicating with my Tenants by Pronotif Certified Email?

In order to ensure the success of Pronotif communication, the landlord must ensure that he/she obtains the tenant’s consent to use the email address for the transmission of communications. In addition, if the email address provided is non-existent, inactive, or inaccessible, the landlord will have to turn to another method of transmitting the document.

How Do I Obtain the Tenant's Consent?

It is recommended to obtain the email on the lease in section A


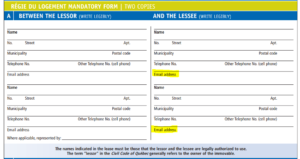
AND to attach a clause to the lease that authorizes the use of this email for all communications.

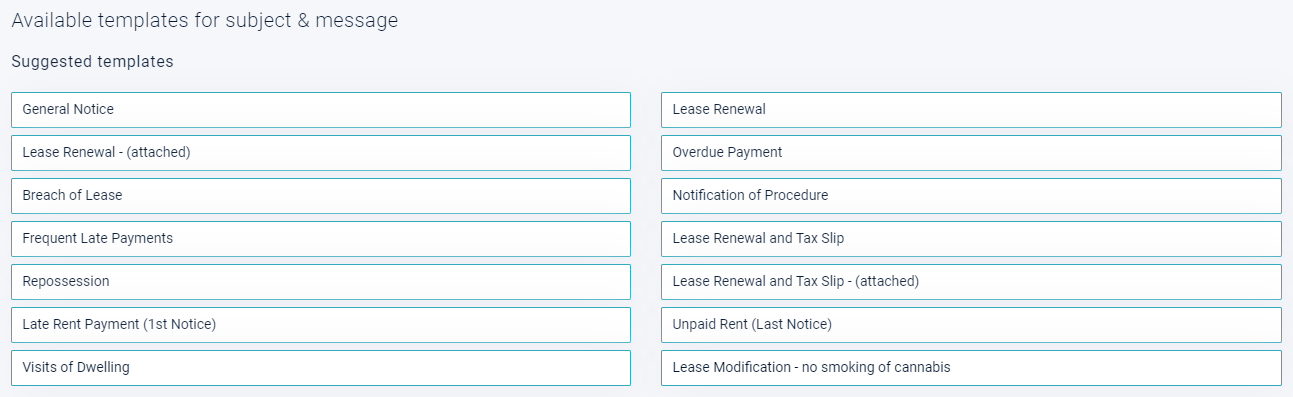
The parties agree to send/receive all notices relating to the lease (renewal notice, repossession notice, tax statement, formal notice, etc.) electronically to the emails indicated on the lease or by any other means of transmission accepted by law. However, it is the responsibility of each party to inform the other of any changes to its contact information as soon as possible.

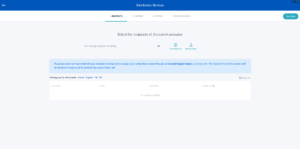
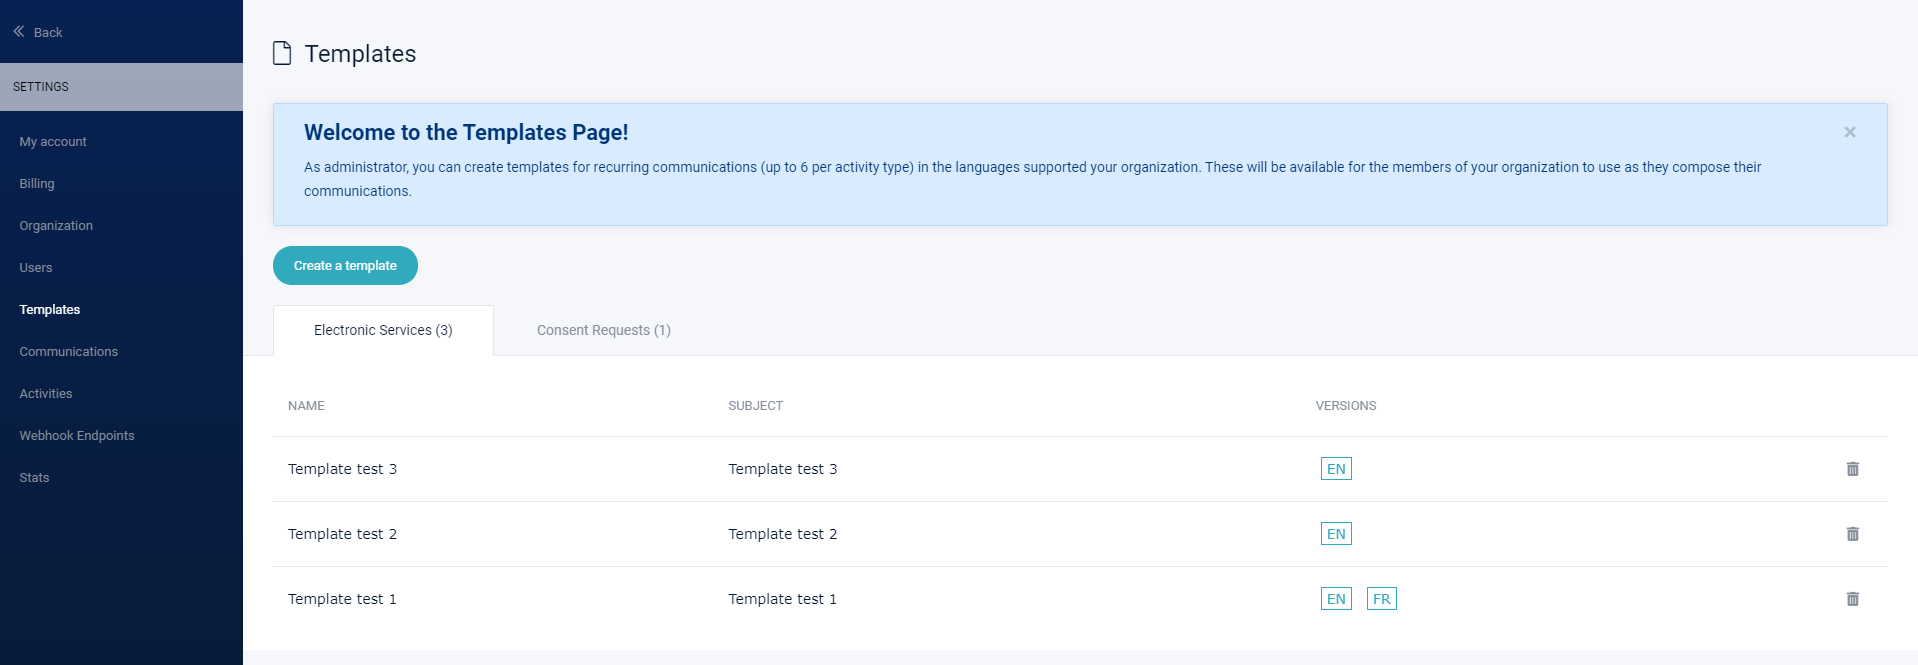
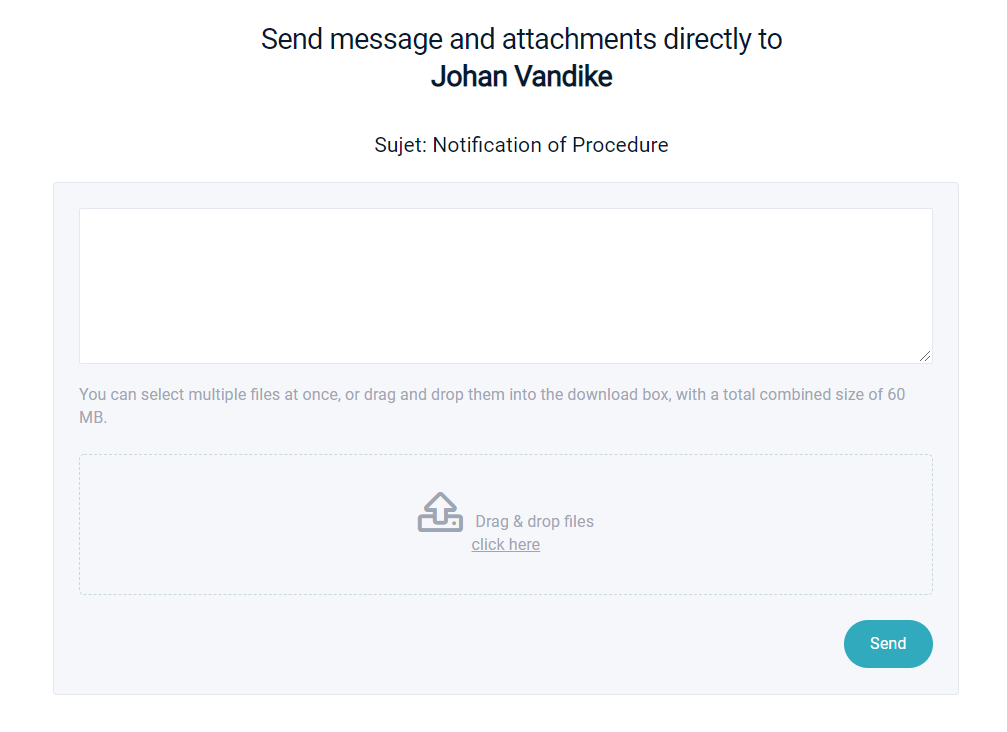
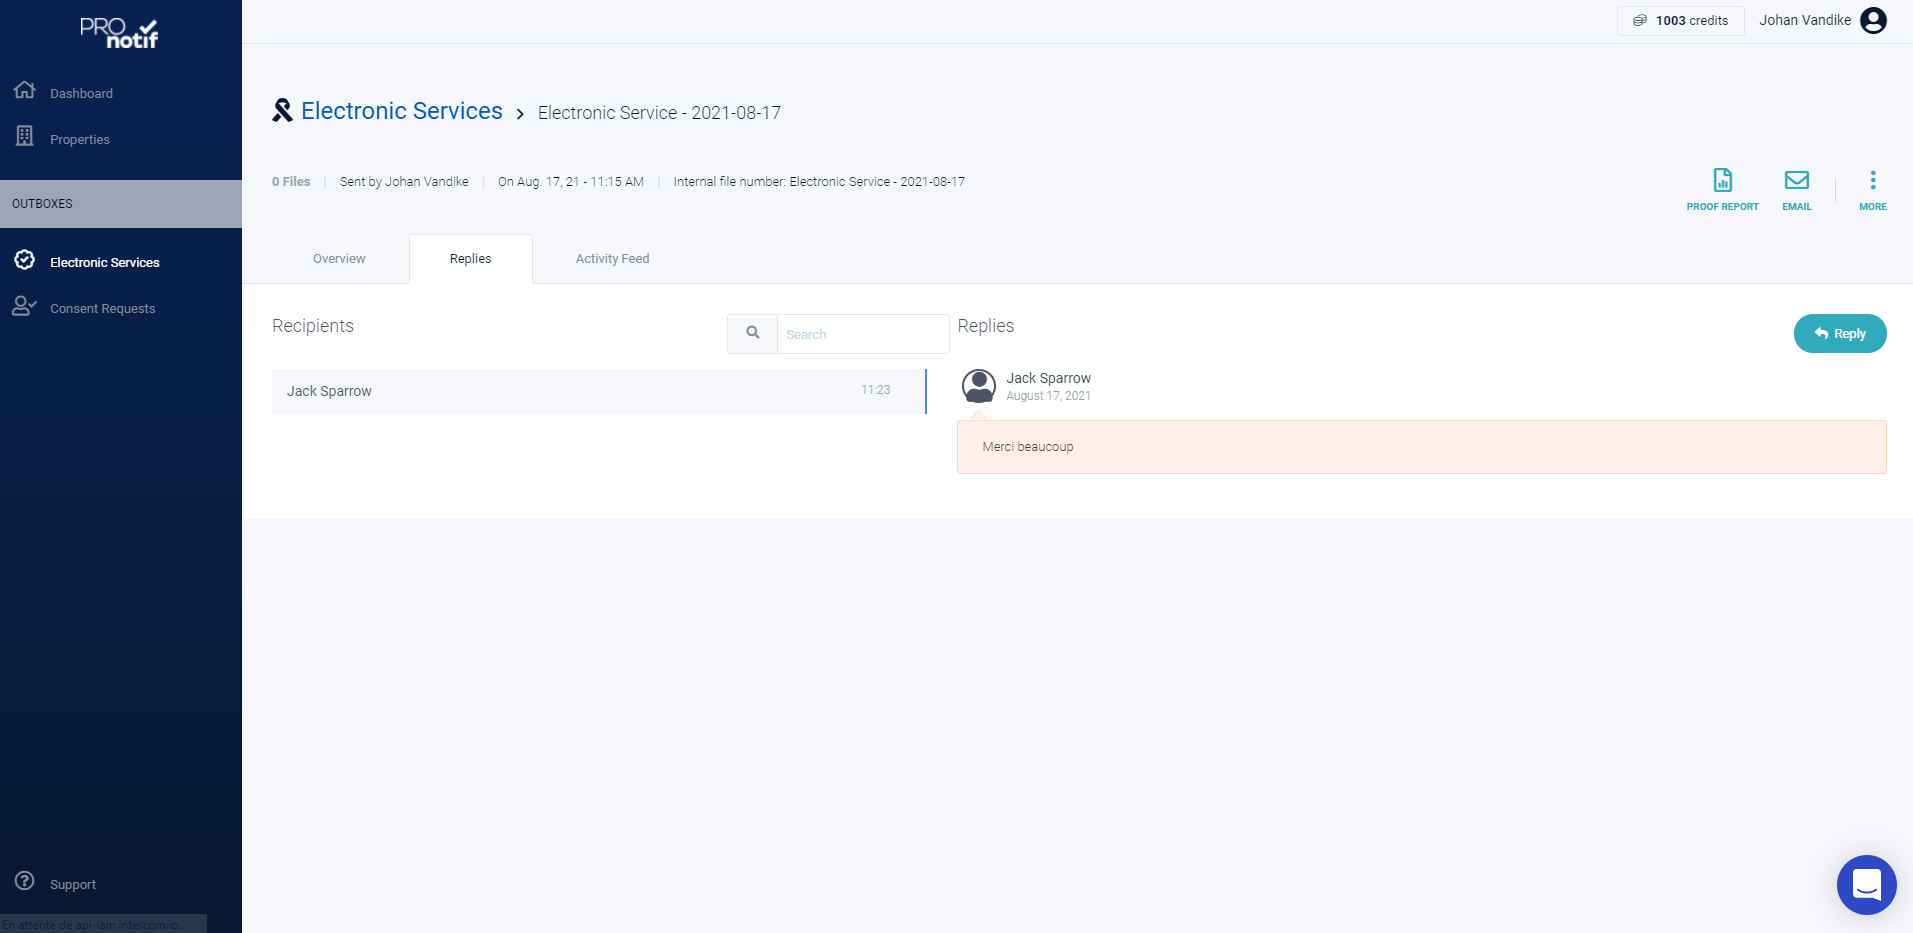
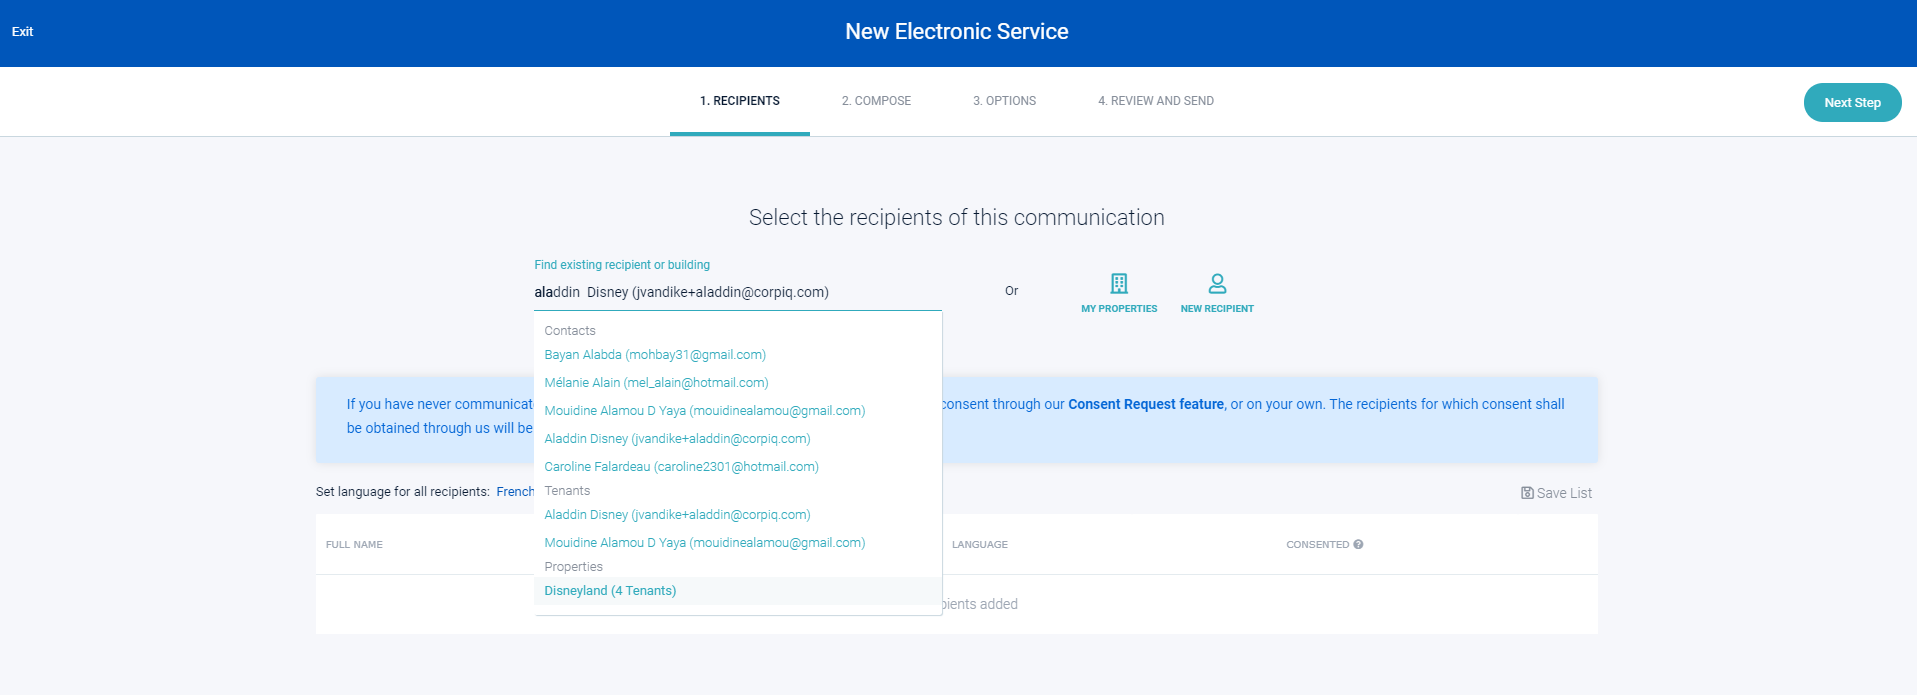
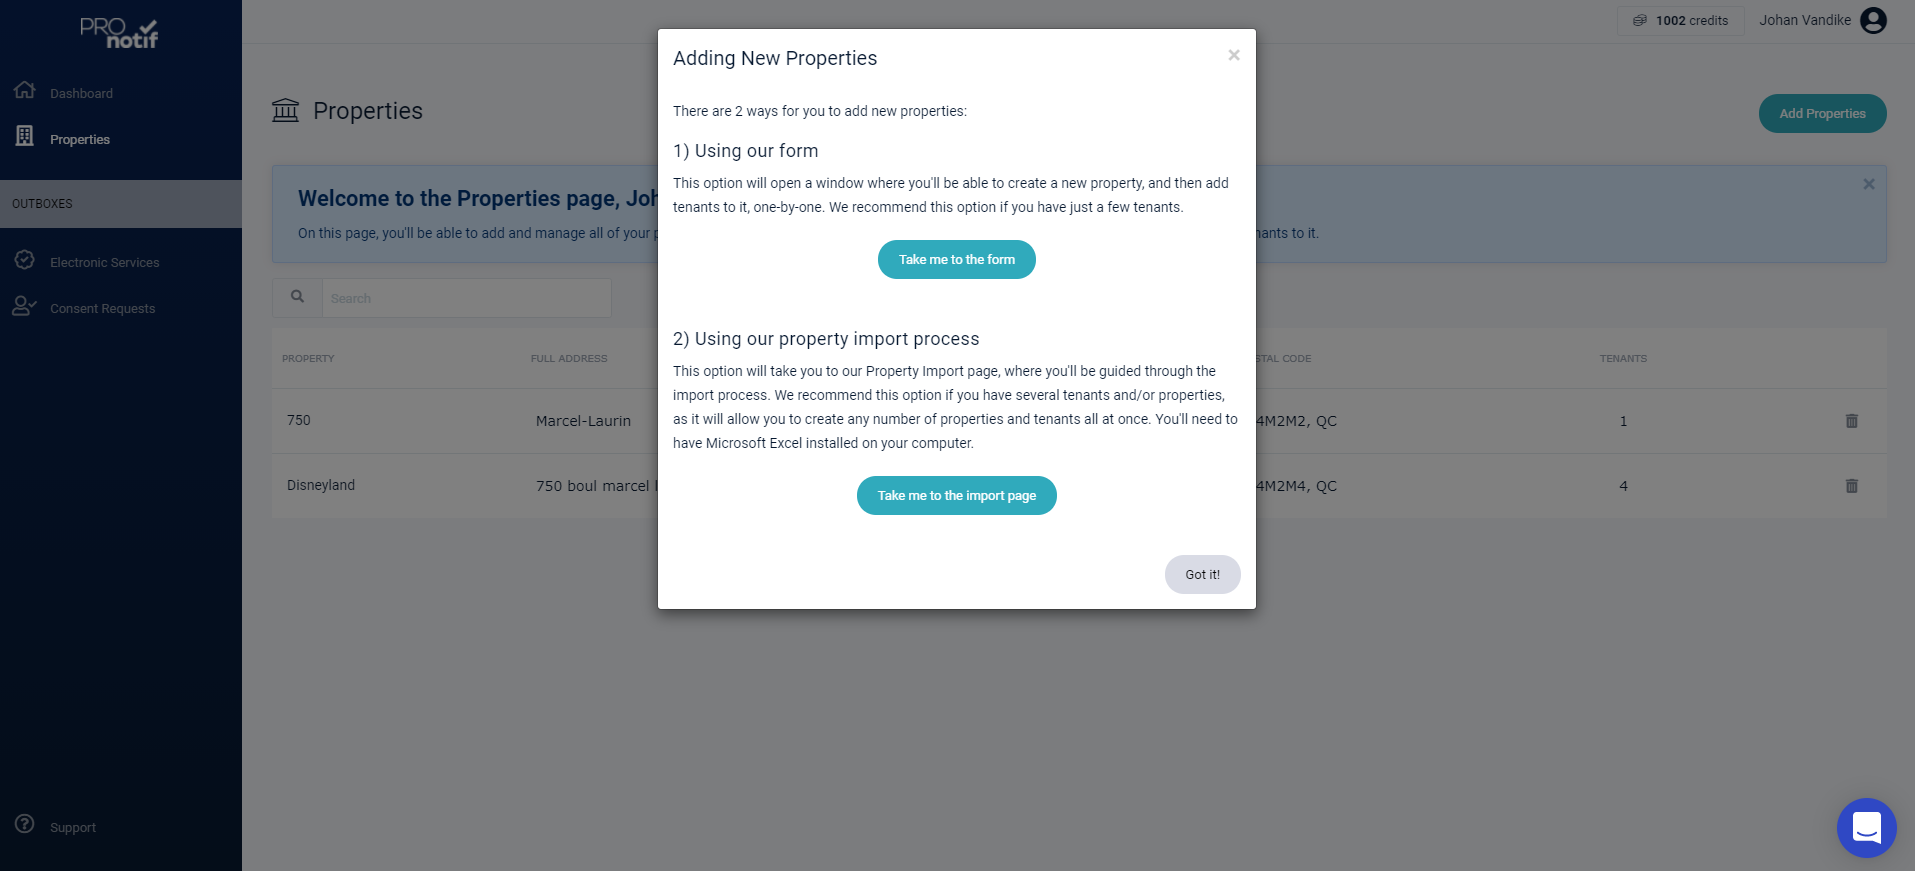
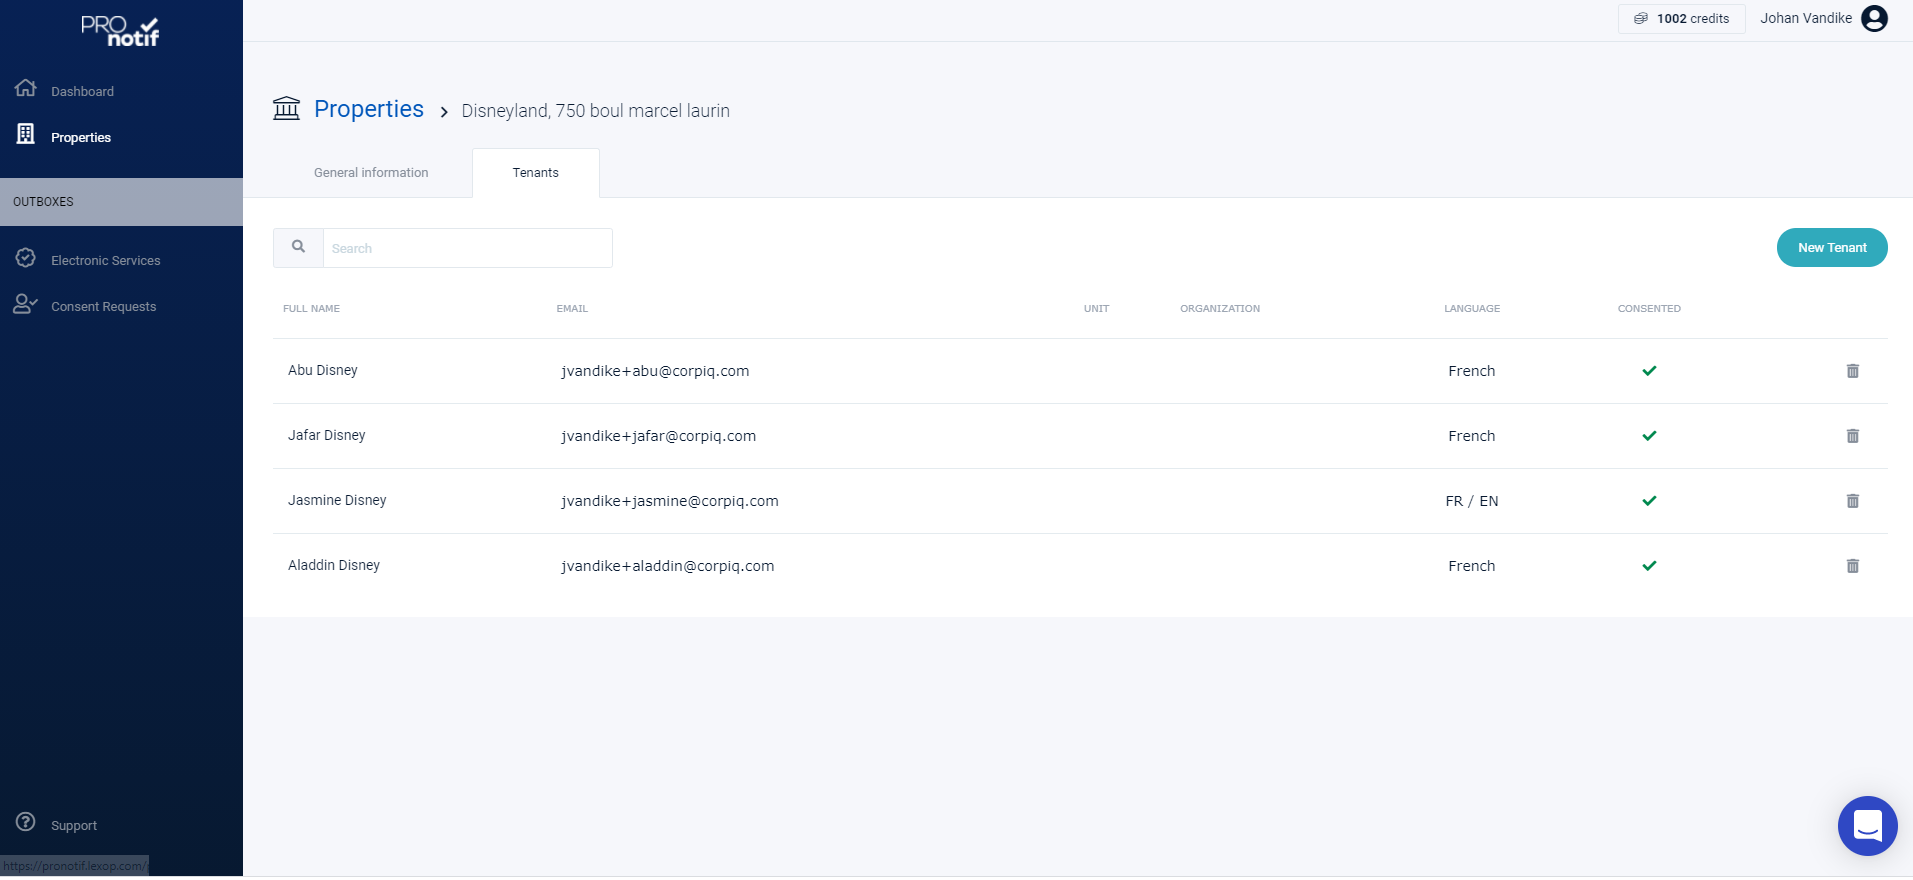
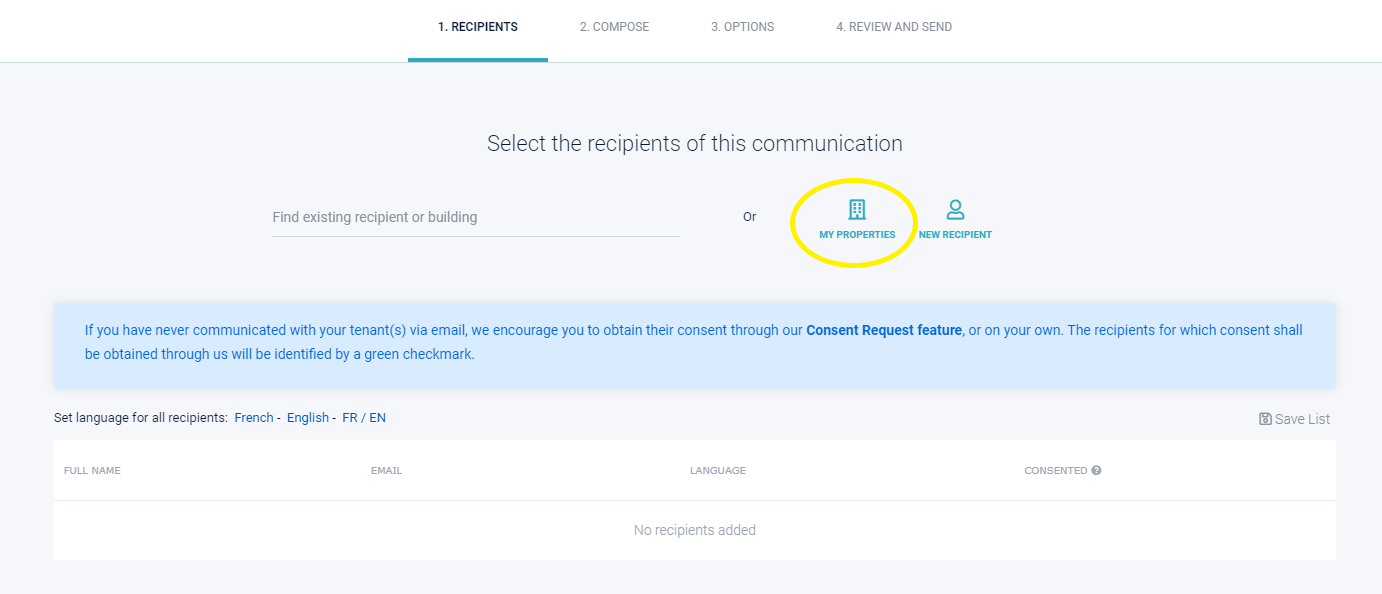
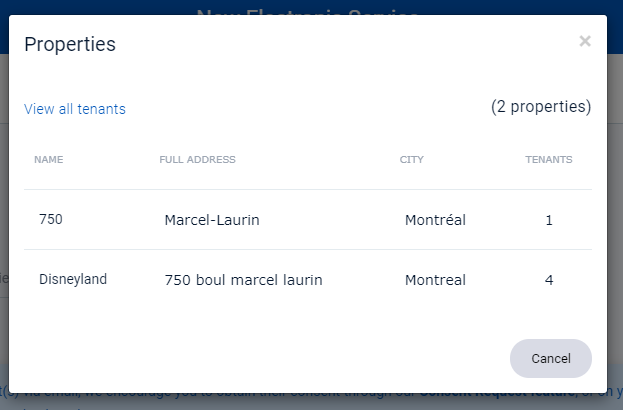
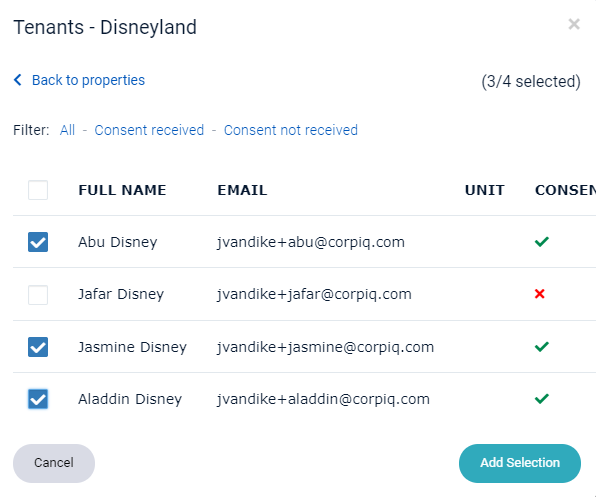
It is possible during the course of the lease to obtain consent by email via Pronotif or by signing a letter:

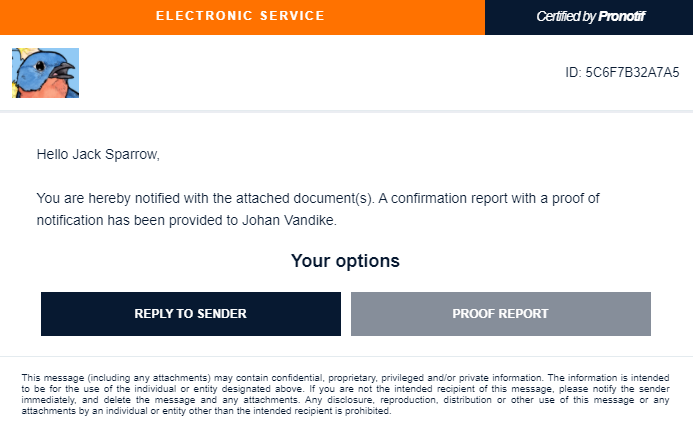
Example of a consent request

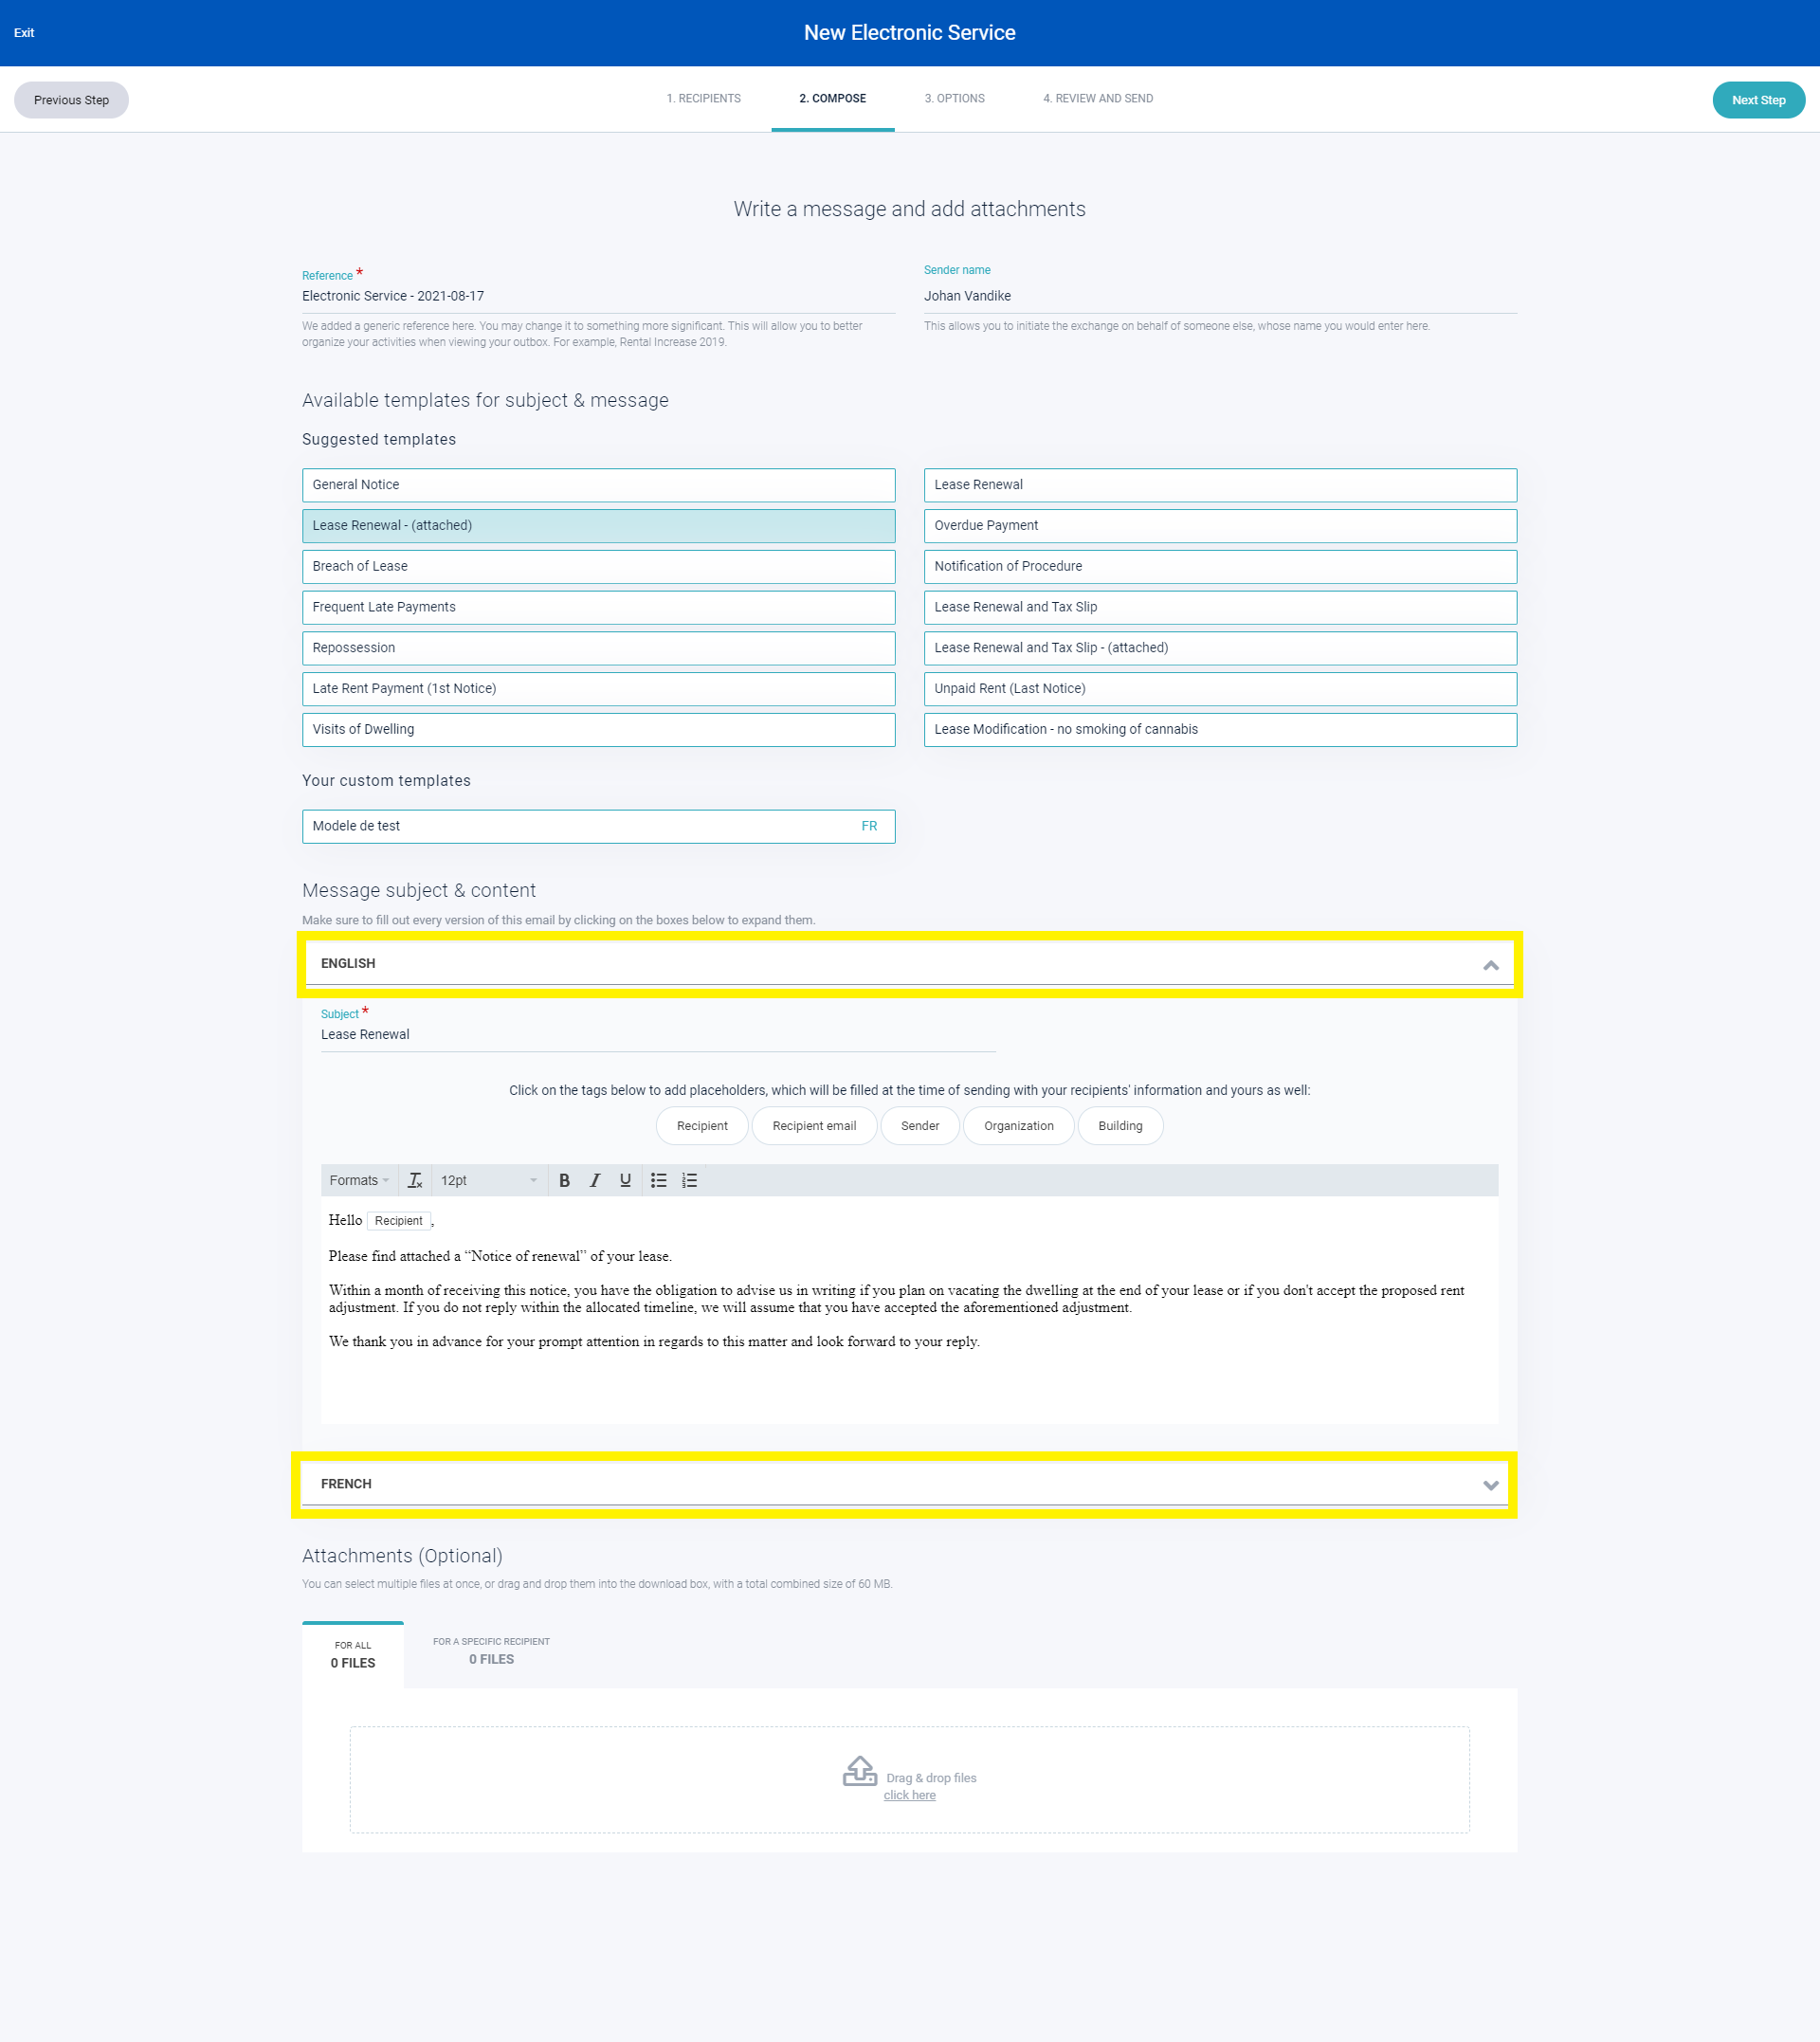
Hello [Name of recipient],

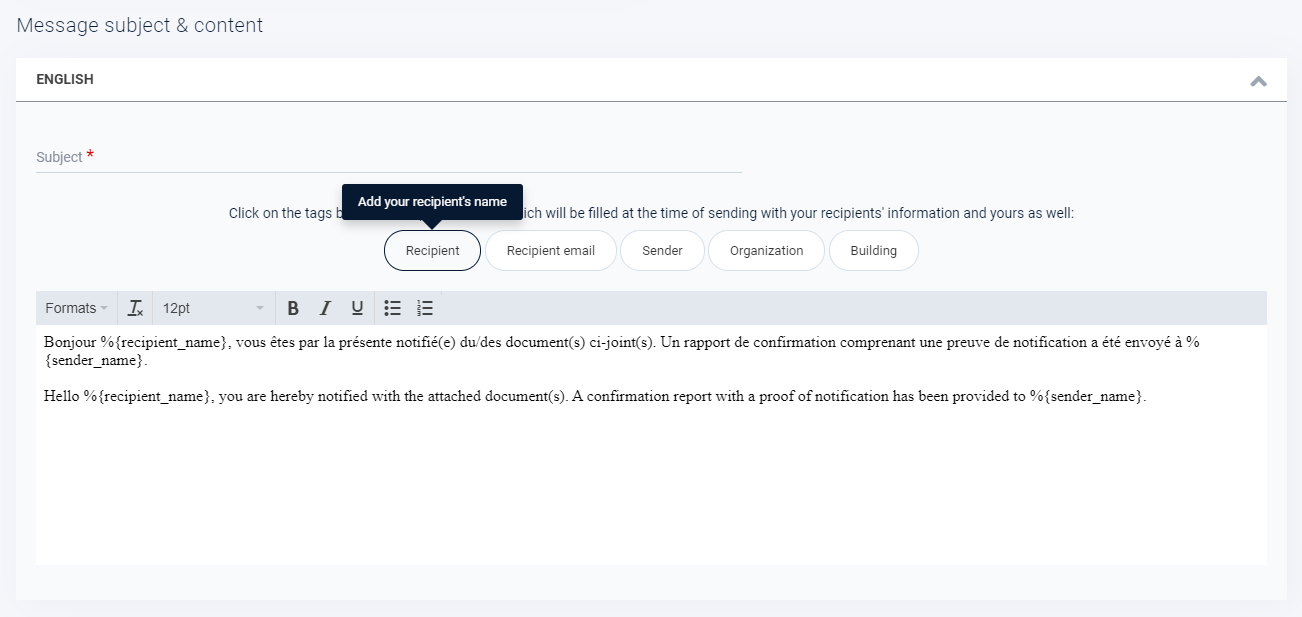
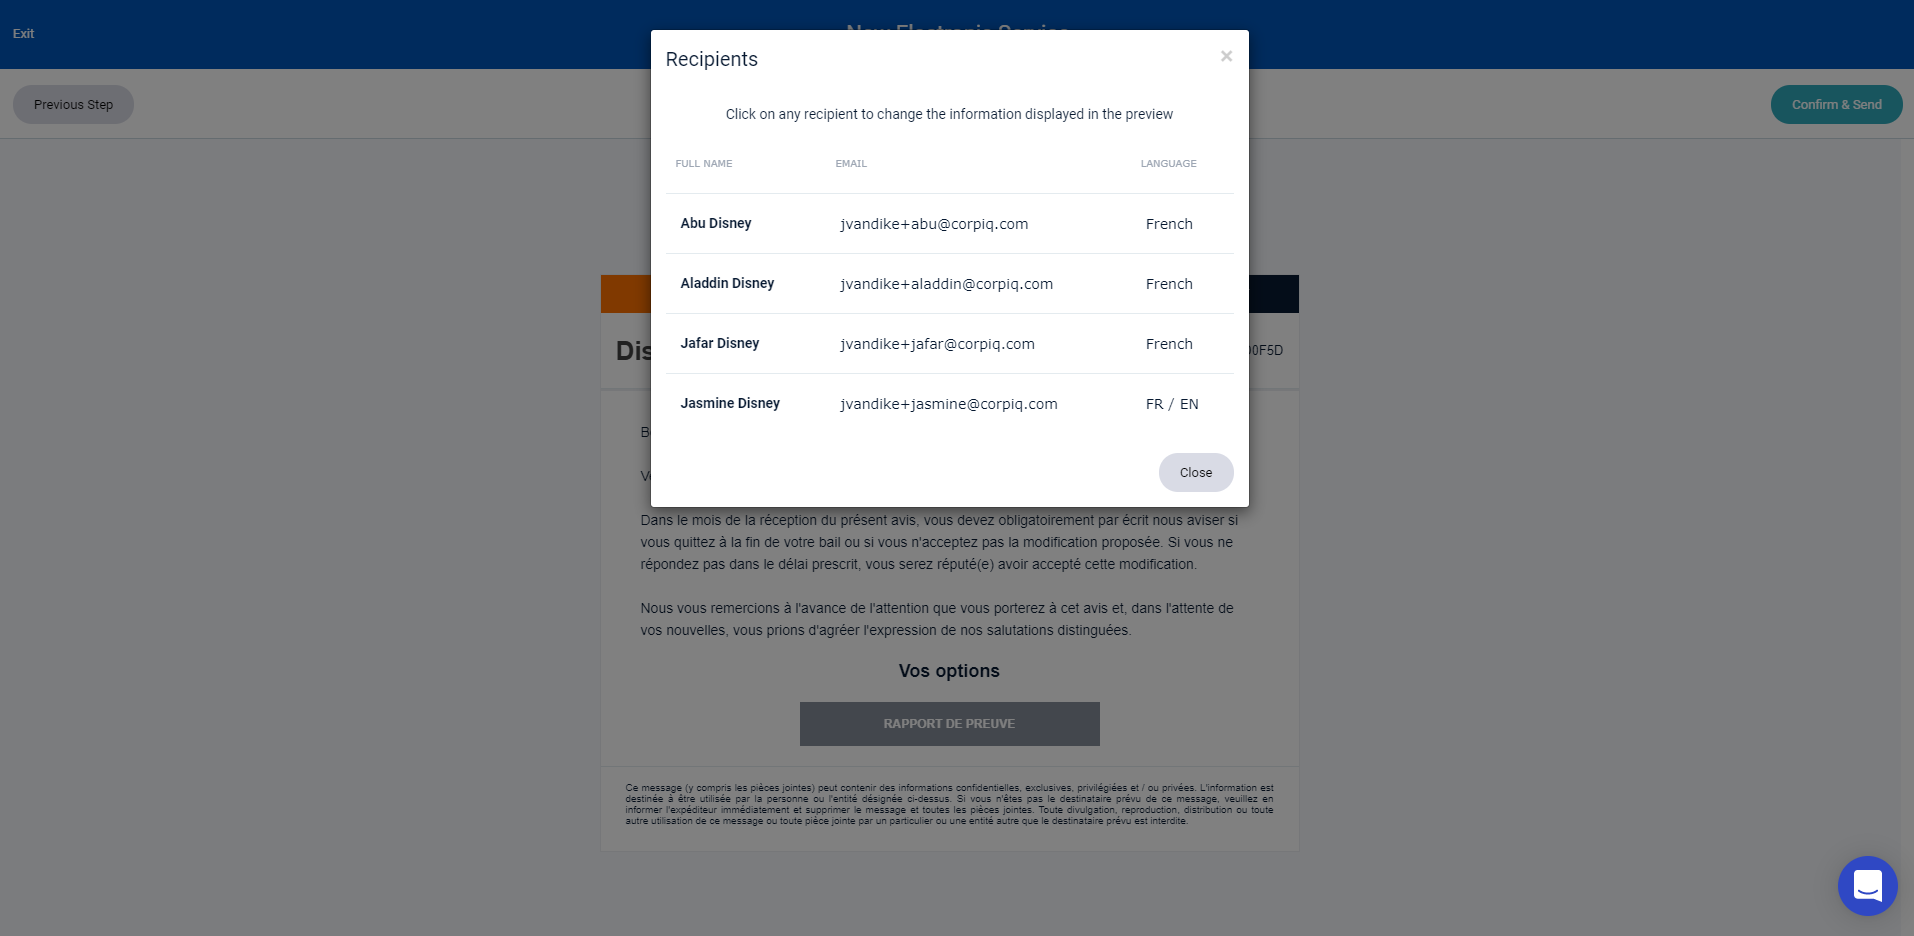
To facilitate our exchanges, we would like to communicate with you by e-mail. We will use the Pronotif service as a secure and recognized environment. Thank you for agreeing to receive any notices and/or information at the following address: [Recipient Email].

By accepting, you confirm:

– That the email address used here is the correct one;

– That you agree to receive communications from us by e-mail at this address;

– That you will review all communications;

– That you will ensure that all communications arrive in the inbox and not in the spam folder;

– That you are responsible for informing us of any change of email address as soon as possible;

-That you are responsible for notifying us of any change of email address as soon as possible .

Thank you for your cooperation,


*Pronotif takes every precaution to ensure that emails do not end up in the junk mail folder. Please make sure to add noreply@lexop.com to your list of accepted emails.


Note: Pronotif is an application developed with the Quebec legal framework in mind. Users can also use it for mailings outside of Quebec, but caution is recommended until validation has been completed.

Invoicing

To access your invoices:

1.Click on your first and last name at the top right of the screen (if you are on mobile, click on the menu then “Invoices”);

2.Click on “Invoicing”.

You will find your different invoices at the bottom of this page, click on one of them to view your invoice in Acrobat format (PDF). If you wish, you can download and/or print it according to your needs.

Consult the Use of Your Packages

It is possible to consult the use of your notifications by clicking on your available credits at the top right of your screen.

You can also access it by clicking on your first and last name (also on the top right) and then click on “Billing”.

If you are using Pronotif in mobile, go to the menu (top left) and click on “Invoices”.

Do my recipients need to have a Pronotif account?

No. Pronotif transmissions use a standard email service. As long as your recipients have a valid email address, you can send them anything.

How do I add properties and tenants?

You can directly use our property import process via Microsoft Excel or use our form to add a new property and tenants one by one.

Here is how to do it:

  1. Click on the “Properties” tab located in the left hand menu;
  2. Click on the “Add Properties” button;
  3. A new window will open showing you the two possible options.

How do I update my properties and tenants?

There are two options available to you:

  1. If you want to update some of the tenants of your existing properties, you can do so manually by going to your properties page and selecting the property you want to update. From there, you will be able to modify the general information of the property and its tenants.
  2. If you wish to update multiple tenants at once, we recommend that you re-import your tenant list. This will replace existing property records but will NOT delete evidence reports related to old properties and/or tenants.

Add Users to My Account Or to my Organization's Account

You can invite new users to use your Pronotif account on your behalf.

To do so, click on your first and last name at the top right of the screen.

Then click on “Settings” and go to “My account”, navigate to the “Users” sub-section and click on the “Invite a user” button.

Add the first name, last name, communication language and email. You will then have to choose the role of the user you wish to add.

Indeed, several roles can be assigned to a user:

Member: does not have access to billing and cannot manage users;

Billing Administrator: access to billing;

Reports administrator: access to reports and statistics;

Administrator: access to billing and can manage users.


Once the role of the person is defined, you will have to click on the “Invite” button. A confirmation email will be sent to the user.


WARNING: Make sure to use an email that you have control over if the user leaves in order to obtain access to the notifications made. To preserve the integrity of the data, there is no access between different users of the same account.

Delete a User From my Account or my Organization's Account

You can delete a user from your Pronotif account or from your organization’s account if you are the account administrator.

To do so, click on your first and last name at the top right of the screen.

Then click on “Settings” and go to “My Account”, navigate to the “Users” sub-section.

Search for the person you wish to delete. Once found, simply click on the trash can icon (on the far right of the user concerned).


WARNING: do not delete an account if you have notifications to keep.

Can I See the Activity for Each User on my Organization's Account?

First, you must be an administrator of the organization’s account. If you are not, approach your organization’s account administrator(s) and request a role change.

If you are an administrator, click on your first and last name at the top right of the screen.

Then click on “Settings” and then “Activities”.

You will see a report of activities by user in your organization. You will be able to see the number and the value of your sends and returns.

What Is the size limit for attached documents?

Usually, your recipients’ servers block emails larger than 25MB. But with Pronotif, you can send files up to 60MB without worrying about size restrictions. The reason is simple, your recipient will receive links to the documents instead of the documents themselves as attachments.

Does the sharing or notification fill my recipient's mailbox? And my outbox?

Not at all. Pronotif allows you to send files to anyone in the world without clogging their inbox or your outbox. Documents that are sent to recipients via Pronotif (with the Outlook add-in or via your dashboard) will not be attached to the email. Only links are added to the outgoing communication.

When using the Outlook plug-in, files are not stored. When sending a normal email, you will find copies of everything in your “Sent” folders, which can make your outbox fill up quickly; however, with Pronotif, only the names of the items are kept, as all files can be found and viewed online from your dashboard.

Therefore, no one is cluttered with the inbox or outbox.

Is It Possible to Consult Sending Statistics?

Yes, click on your first and last name at the top right of the screen.

Then click on “Settings” then “Statistics”.

This will show you the statistics related to your account regarding email notifications and consent requests. You will be able to see the percentage of open rates for messages sent, opened, and downloaded attachments by the recipients of your mailings.

If you are an administrator or reporting administrator for your organization’s account, you will also be able to view statistics for the entire organization.

Can I modify a lease after I have produced it and/or sent it to a prospective tenant?

As mentioned in the explanation of the different steps of filling out the lease, the Review section allows you to review the different sections of your lease and thus verify that all the information is accurate and appears correctly.

At the review stage, you can always make corrections if necessary. If you see that part of your text is not entirely visible, it is due to a lack of space and your text has been truncated. We recommend that you optimize it so that it appears correctly.

Once your lease is produced it is not possible to modify it and no refund will be possible.

If you finally noticed an error on your lease after having produced it and/or having sent it to a tenant, you always have the possibility of producing a new one.

Remember, you are the last person to sign the electronic lease. You are the one who finalizes the process of signing a lease.

How do I change the default messages for my certified emails, shares, and consent requests?

The messages in your notifications, shares, consent requests, and document collections are formulated by default by Pronotif. They define transmissions to recipients and serve as introductory messages. To change them, you must be an organization administrator or a division manager. Go to the Settings page and navigate to the “Communications” section. You will then be able to edit the content of outgoing messages. The “Recipient Name” and “Sender Name” buttons are boilerplate items that are added and later replaced with the actual names when sending. Don’t forget to “Save” once you are satisfied with the changes. To return to the default messages, simply delete the contents of the box leaving it empty and “Save” again.

How do I select my recipients from my properties?

Here’s how to do it:

  1. In the first step of creating an email, click on the “My Properties” option to open the list of your properties.
  2. Click on the desired property to open the list of its tenants.
  3. Select the tenants you wish to add as recipients to your email. Note that you can select them individually, by property or by consent status using the filters.
  4. Click on the “Add Selection” button.

What should I do if my email was not sent due to an invalid email address?

Here is how to proceed:

  1. Go to your outbox; you will see a red warning icon next to the recipient that informs you that your email was not delivered to them.
  2. Click on the warning icon. A new window will appear in which you can correct the incorrect e-mail address.
  3. Click on “Confirm and Send” to resend your email to the new address. You will be able to follow its status on the same page.

N.B. You will be notified by email each time a transmission to a recipient fails. To access the email details page, simply click on the “Go to my outbox” link in the email.

Can I schedule my email to be sent at a future date and time?

Yes. In the third step (Options) of creating an activity, you have the option to set the date and time you want your email to be sent.

All your scheduled emails will be saved in your outbox, under the “Postdated” tab. You can modify them before sending by simply clicking on one of them.

Note: In the table of your scheduled emails, the “Ready to go” column indicates whether an email contains all the information required for sending. A green check mark indicates that it is ready to be sent, while a red check mark means that information is still missing.

Can I send different files to different recipients in the same email? If so, how can I accomplish this?

Yes, in the second step (Compose) of creating a certified email, you can choose to attach the same file(s) for all your recipients by dragging them to the “For All” tab of the “Attachments (Optional)” section.

To send different files to different recipients, you must do so via the “By Recipient” tab in the “Attachments (Optional)” section, by dragging and dropping the files into each recipient’s respective box. Files sent to a specific recipient will only be visible to him/her.

Installation (Outlook Add-in)

To install the Outlook add-in:

If the installed version is the original version of Lexop, you do not need to uninstall it (typical installation).


1. Download the Pronotif Add-in installation file directly from https://www3.corpiq.com/pronotif/addin/PronotifModuleSetup.msi

2. Close Outlook;

3. Double click the executable file to launch Pronotif for Outlook Add-in Setup Wizard;

4. Follow the instructions and select your language;


On some Windows 10, a SmartScreen window will appear. You can click on additional information to view the certificate information. 

Click on “Run anyway”;


5. Once the Outlook Pronotif Add-In is installed, click on “Close” to exit the configuration wizard
;

6. Make sure you have an account set up beforehand (if not, visit https://pronotif.pronotif.com/fr/inscription to create one);

7. Launch Outlook;

8. Lexop for Outlook Add-in is now installed and the “New With Pronotif” action group is added to your Outlook ribbon, as shown below.


You can click on the “About” button to see the version of the add-in.


If you change the language, you must restart your computer.


At the time of the first sharing or notification, you will have to identify yourself by entering your username (your email) and password.


Sharing via Outlook

As mentioned in the introduction, Pronotif allows its users to share documents to recipients of their choosing, without any membership requirement. This activity is created through the Pronotif Outlook Add-In same as a regular email.
To share documents:

1. Click “Sharing” from the “New With Pronotif” action group (on the Outlook ribbon);

2. Set the Sender Name (optional) if you are sharing a document on behalf of someone else. This will be displayed by the email service of the recipient(s) as the “From” field;

share2

3. Add recipient(s), same as for a regular email. If you already have lists previously saved in your Dashboard, you can recall them by clicking “Load recipients…”;

4. You can select “Secure Transfer”, if you wish to lock the attached file with a secret PIN and toggle “Clear Metadata” to clear or not the metadata related to your attachments (this includes track-changes and comments for MS Office documents);

share3

5. Click on “Edit recipients…” and enter each recipient’s full name if needed;

You can also click “Save List…” to store the list for future use. After that, for all subsequent Shares and Notifications, you will be able to recall it by selecting “Load Recipients”.

If you enabled “Secure Transfer”, you will have to enter the security PIN at that time. This key will be used to block the access to any of the download links leading to your attachments (see Guest and Secure Portals section).

6. Add attachment(s) you wish to share, same as for a regular email;

7. You can enter any message for the recipient(s) in the main body of the Pronotif form (same as for a regular email), as well as change the Subject;

8. Click “Share” or “Send”.

Here’s an example of the email that your recipient(s) would receive:

Notification via Outlook

Pronotif also allows its users to notify (e-serve) documents to recipients of their choice, without any membership requirement. This activity is created through the Pronotif Outlook module (or your Dashboard) much like a regular email.

To notify documents:

1. Click “Certified Email” from the “New With Pronotif” Action Group (on the Outlook ribbon):

2. Enter information relative to the current case:

notification2

3. Enter Sender Name (optional) if you are notifying a document on behalf of another person. This will be displayed by the email service of the recipient(s) as the “From” field:

share2

4. You can select “Secure Transfer”, if you wish to lock the attached file via a secret PIN and toggle “Clear Metadata” to clear or not the metadata related to your attachments (this includes track-changes and comments):

share3

5. Add recipient(s) just as you would for a regular email. If you already have lists previously saved in your Dashboard, you can recall them by clicking “Load recipients…”;

6. Click on “Edit recipients…” and enter each recipient’s full name if needed :

You can also click “Save List…” to store the list for future use. After that, for all subsequent Shares and Notifications, you will be able to recall it (or others), by pressing “Load Recipients”.

If you enabled “Secure Transfer”, you will have to enter the security PIN. This key will be used to block the access to any of the download links leading to your attachments (see Guest and Secure Portals section).

7. Add attachment(s) you wish to notify, same as for a regular email;

8. You can enter any message that you would like to send to the recipient(s) in the main body of the Pronotif form (same as for a regular email);

9. Click “Notify” or “Send”.

Here’s an example of the email that your recipient(s) would receive:

A confirmation report will be available to your recipients, in the email or in their Pronotif Inbox (from the Online Dashboard if they are members) and to yourself, in your Pronotif Outbox (from the Online Dashboard).

Here is an example of the confirmation report: